Art is an experience. If you’ve ever walked into an art gallery you know that viewing art can have a profound effect on your soul. Many artists we meet shy away from sharing art online because they feel it takes away that in-person experience. While there’s nothing like seeing art without anything between your eyes and the paint on the canvas, the world we live in is a digital world. We’ve become more and more accustomed to seeing beautiful things on our screen, so why shouldn’t your art be part of that online experience?
While you may be a master artist, photographing your art for digital marketing can feel a little intimidating. Technology has made photography very accessible, though. With a few quick changes to your setup, your art photography can go from feeling like a little snapshot for journaling to being good enough for your website gallery – all without the expense of a professional photographer or professional DSLR camera.
Here our a few of our favorite tips to improve your art photography:
Setup
If you’re photographing smaller pieces, you may consider a small lightbox (or even a mock lightbox setup) to offer the most even light across your work. If your artwork is larger, hang it on a wall near windows (ideally at the same level of the windows – more on that in a minute) and set your tripod up several feet back so as not to distort the image.
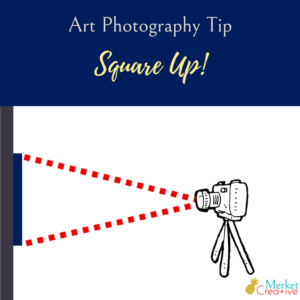
Square Up
Be sure you’re squared up perpendicular to your artwork. Don’t take pictures from an angle (below and off-center are two common mistakes we see). This can be achieved easily by hanging your artwork at eye-level on your wall.
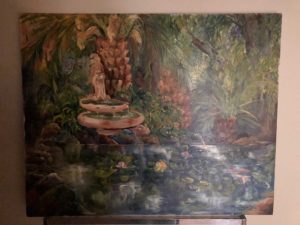
See the distortion in this angle:
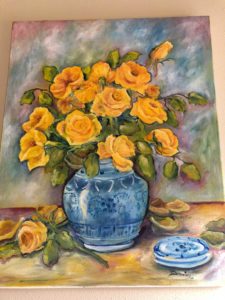
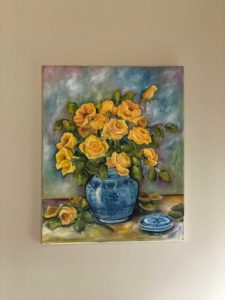
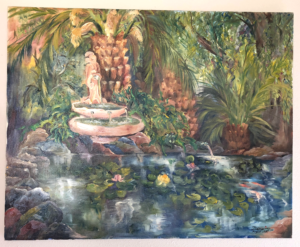
Now compare it to a picture of the painting squared up on the wall. Notice how the roses look different in each painting?
Here’s a quick recap of how to set it up:
Consider use
Are you photographing your art for Instagram? Facebook? Your website gallery? Your online art shop? Take this into consideration, as you may want to display your artwork differently for each platform. If you’re not quite sure, aim to get a really great picture of the artwork without any distractions – this is a great way to photograph your art in a way that can be used across all platforms.
Lighting is Everything
Good light can make or break your art photography. For best results, take your picture with natural light on a cloudy day. Clouds act as a natural diffuser, evening out the light cast across your artwork. Hang your art
If natural light isn’t an option, aim to bounce light off a white source like a ceiling onto your artwork. The bounce helps you avoid harsh shadows, casting a more natural light feel onto your art.
Look at the example below…


Hold still!
A blurry picture is one of the worst ways to share your art. Instead of experiencing the beauty of your creation, viewers are forced to squint and wonder what the artwork actually looks like. Avoid this at all costs! Good lighting helps, but there are a few tricks to additionally help a steady hand.
Use a tripod. Prevent the blur that comes from holding your camera by placing it on a steady surface, such as a tripod. This is especially helpful when photographing multiple art pieces at once – you can set up your camera perfectly, then just swap out the artwork for convenient photography!
Take the picture as you’re breathing out. Inhale, then slowly exhale while pressing the button. Our bodies naturally steady as we exhale, so use that to your advantage!
Use burst mode on your camera. Burst mode takes fast images, keeping the shutter from staying open too long, and giving you crisper images.
Use the timer! Often times the blur of an image is caused by the finger press and release on your camera. If you’re unable to use a tripod, use the timer. Hold steady and breathe out as the timer counts down.
Consider your Camera
Newer phones have great cameras on them, but if your phone is a bit older, you may want to consider a simple point-and-shoot camera for better quality images. Even point-and-shoot cameras allow for greater control over settings. If you’re photographing art for your online gallery or store, it is really worth considering switching cameras for better images.
Don’t Forget Post production
While we’d love to say it’s as easy as snapping a pic on your iphone and posting it to your gallery, often times subtle adjustments need to be made in post production to ensure the color quality and image quality are comparable to the quality of your artwork. Investing in simple editing software (like Photoshop for $10/month) is worth it’s weight in gold. (I suppose in this digital age it’s metaphorical weight… but you get the idea!)
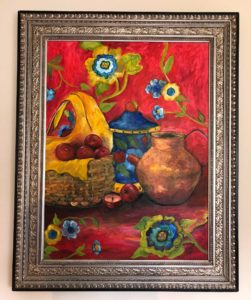
In this image, notice the yellow in the walls:

This image has been subtly white balanced (it’s easiest to see in the wall.)
Pay attention to resolution
Finally, be sure you’re uploading a proper resolution version of your image! Your image should be 1-3 (-ish) MB, usually 1200-2000 pixels on any one side. Small images get blurry when users zoom in, and images that are huge slow down the load time of your website (which is not good for your users OR SEO!)
Remember – your art is an experience. Having an online presence doesn’t take away from that experience – it can actually enhance it by bringing the art to your fans. Take the few extra steps necessary to provide the best experience you possibly can. Art can change the world – so let’s give it every opportunity to do so!
What questions do you have? What tips have we missed? Let us know in the comments below.